
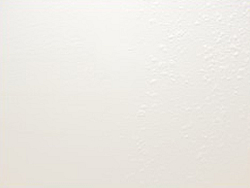
 Figure 3) After sanding to smooth the
The Professional Painting Contractor's Method
to Repair Cracked Dry Wall
As your house or building settles, experiences damage, or lives through minor earthquakes (which happen frequently here in the Pacific Northwest, even though you may not notice), your interior walls may develop splits and cracks. Usually these gaps occur at or near corners, below or above window and door openings, and at butt joints between sheets of drywall.
Many painting or drywall contractors still use inexpensive joint tape and inferior plaster techniques to fix these problems. The result is a seam which is visibly raised, especially on flat walls. You may have seen this as regularly-spaced "bumps" or undulations along walls or ceilings. Your walls and ceilings deserve better.
Four Steps to Repairing Cracks, Splits or Cuts in Wallboard
Northwest Quality Painting uses only the highest-quality materials and personal attention to detail. The result is a completely invisible seam which is actually stronger than the drywall material underneath.
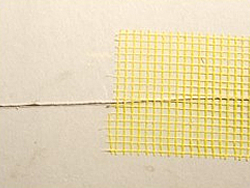
Figure 1 – Fiberglass open-weave tape is applied along the length of the crack. We use fiberglas because it is thinner than tape, so it is less visible, because it is stronger than paper tape, and because the open weave allows plaster to stick to the underlying surface to create a better, lower-profile bond.
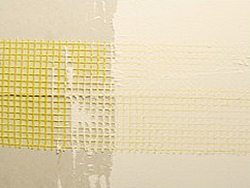
Figure 2 – Plaster is applied on top of the tape and pressed through so it adheres to the wallboard underneath. Using a wide trowel or blade, plaster is spread about 4 inches on either side of the tape to ensure a smoother transition with no visible lines.
Figure 3 – Even when a texture is to be sprayed over the plaster, it is important to sand the repaired area first, to present a smooth, even surface. This takes time, but the professionals at Northwest Quality Painting take these extra steps to ensure you get the best possible (and least visible) repair.
Figure 4 – The textured wall is primed, if necessary, and painted to blend perfectly with the surrounding existing finish. The crack, split or cut, and the tape, are concealed and invisible!
- If you have defects in your interior or exterior walls, contact Northwest Quality Painting today to get a free consultation and estimate for your repair and painting projects.
- Download a free report: "How to Choose a Painting Contractor"